• Home
  • Shell
    • Emacs
    • Perl
    • screen
    • sed
  • Ubuntu
    • VNC
  • Web Development
    • Javascript
    • Joomla
    • MySQL
    • osTicket
  • Windows
    • Gimp

Posts in category Windows

vmWare> Boot to fullscreen VM after host boots.

Nov02
2011
Written by Scott Rowley

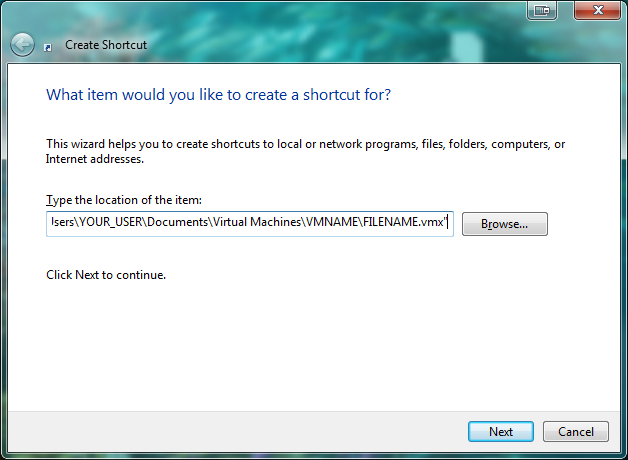
Create a shortcut with the following TARGET.

“C:\Program Files\VMware\VMware Workstation\vmware.exe” -X “C:\Users\YOUR_USER\Documents\Virtual Machines\VMNAME\FILENAME.vmx”
New Shortcut

The -X opens in Full screen (before you go looking, I’ll save you the trouble — there is no dual screen option as of the writing of this article.)
Replace “C:\Users\YOUR_USER\Documents\Virtual Machines\VMNAME\FILENAME.vmx” with your vmx file location.
The quotes are required.

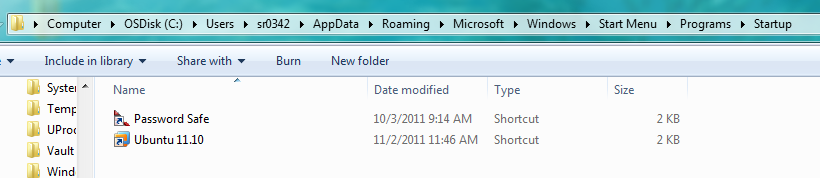
Put the shortcut into the Windows Startup folder
Windows Startup Folder

Voila!
Ubuntu

Posted in Ubuntu, vmWare - Tagged fullscreen, host, vmware, workstation boot

HTPC> Setup Windows 7 as a Media Center with XBMC

May22
2011
Written by Scott Rowley

The following is an article I came up with after setting up my HTPC with XBMC for the 2nd time. I originally had Boxee on it and I do like Boxee — but I just don’t use the online content that much and XBMC is slightly more customization friendly. At any rate — this is what I’ve come up with. If you find it useful, have questions or comments please leave me a message in the comments below the article.


Assumptions: You have Windows 7 installed on a desktop PC.

Download & Install XBMC — http://xbmc.org/download/

Setup XBMC to see your Media

Videos> Add source> Browse> Find & Select Folder containing your Movies
– If you have additional locations click the Add button and then Browse to locate
– Repeat for as many locations as necessary
Once you have all of your Movie paths entered you can navigate down to the bottom and change the name, I recommend “Movies”.
Click OK
Select a “Scraper” to retrieve movie information — For movies you will want to select (Movies) themoviedb.org.
Click OK
Repeat the same steps for TV, selecting the appropriate scraper for TV.
Videos> Highlight “Movies”> Hit “C” and select the “Scan for new content”.
Wait for it to finish adding content then repeat for any other media you added, such as “TV”.

Once you have content you can now change how your Skin looks — I prefer to have “Videos” replaced by “Movies” and “TV Shows”
System> Skin>
– Select “Hide — Videos”
– Deselect “Hide — Movies” and “Hide — TV shows”
– Show/Hide anything else you want to.

Now we’ve got our basic setup completed. If you want a simple setup that you can turn on manually and watch movies/tv you can stop here. If you want a HTPC that will power itself off at night,
turn itself on in the morning, boot straight into XBMC, and can be controlled by your phone — then the rest of this tutorial is for you.

READ MORE »

Tagged advancedsettings.xml, auto, automatic, bios, boot, control, fullscreen, htpc, movie, music, power, remote, schedule, scheduler, task, television, tv, video, windows 7, xbmc, xmbc

Windows> Batch convert video with Handbrake

May13
2011
Written by Scott Rowley

The following code is setup for use with a Nook Color, but you could change the resolution for use with other devices as well. If you have any that you find work well for you please post them in the comments and I will extend the article.

First off, if you don’t already have it you obviously need Handbrake

Thanks to RedShirt for the original code.
handbrake_nook.bat

:: http://www.sudobash.net?p=594
:: Nook Color
@echo off
FOR /F "tokens=*" %%G IN ('DIR "%~1" /B /S /A:-d') do (
FOR /F "tokens=*" %%H IN ('DIR "%%G" /B /A:-d') do (
:: This assumes you have the default install location on Windows 7.
"C:\Program Files (x86)\Handbrake\HandBrakeCLI" -e x264 -2 -b 702 -a 1 -E faac -B 48 -6 mono -R Auto -D 0.0 -f mp4 -I -X 854 -m -x level=30:cabac=0:ref=1:analyse=all:me=umh:no-fast-pskip=1:psy-rd=0,0:bframes=0:weightp=0:subme=6:8x8dct=0:trellis=0 -D 1.5 -i "%%G" -o "C:\Users\YOUR_LOGIN_NAME\Videos\transcode\%%H-NOOK.mp4"
)
)

handbrake_kfire.bat

:: http://www.sudobash.net?p=594
:: Kindle Fire
@echo off
FOR /F "tokens=*" %%G IN ('DIR "%~1" /B /S /A:-d') do (
FOR /F "tokens=*" %%H IN ('DIR "%%G" /B /A:-d') do (
:: This assumes you have the default install location on Windows 7.
"C:\Program Files (x86)\Handbrake\HandBrakeCLI" -e x264 -2 -b 702 -a 1 -E faac -B 48 -6 mono -R Auto -D 0.0 -f mp4 -I -X 1024 -m -x level=30:cabac=0:ref=1:analyse=all:me=umh:no-fast-pskip=1:psy-rd=0,0:bframes=0:weightp=0:subme=6:8x8dct=0:trellis=0 -D 1.5 -i "%%G" -o "C:\Users\YOUR_LOGIN_NAME\Videos\transcode\%%H-FIRE.mp4"
)
)

Make sure the entire command is all on one line with no line breaks or wrapping or this will not work. Don’t forget to change your destination directory to reflect your own login name. Also make sure that the entire destination path exists (by creating the “transcode” directory). Don’t worry about “Videos”, Windows sees that the same as “My Videos”.

Note: This code references the (x86) Program Files. If you are not running 64 bit then this will not be an accurate location:
Untested — Remove ” (x86)” for use on non 64-bit Windows

Now, you can either place the batch file wherever you like and then run it from the command line like so:
handbrake_nook.bat

Or you can run the bat file right from the same directory the video files are in and supply no directory, such as:
handbrake_nook.bat

To Do: Have a nightly check to see if there are any files in the selected directory. If so — convert them and then move the originals to another folder.

Tagged bat, batch, color, convert, handbrake, kindle, kindle fire, mobile, nook, transcode

Web Dev> Force users from http to https

Apr05
2011
Written by Scott Rowley

Tested and verified working for *nix servers:

Add the following to your .htaccess file in the root of your website:

Options +FollowSymlinks
RewriteEngine on
RewriteCond %{SERVER_PORT} =80
RewriteRule ^(.*) https://%{SERVER_NAME}%{REQUEST_URI}

I don’t work with IIS so check the following link for information on setting up the redirect on IIS servers:
http://www.sslshopper.com/iis7-redirect-http-to-https.html

Posted in Ubuntu, Web Development - Tagged apache, follow, force, htaccess, http, https, IIS, nix, options, rewrite, server, symlinks, user

Windows> Move your offscreen windows back on screen

Nov03
2010
Written by Scott Rowley

This morning I was majorly annoyed when a Gimp window was offscreen and there was not a damn thing I could figure out to do to finally be able to move it. The standard way to move a window back on screen is to right click on the taskbar item and select move and then use the arrows to move it back. However, since Gimp has these annoying ass multi-windows that wouldn’t work as all it wanted to move was the main window. After some frustrations and googling I finally found the following to work for me.

The window that was off screen was the “Toolbox” window. The top of it was completely off screen so there was no hope of right clicking it and getting into the menu to select move. Well fortunately some of the most annoying things have the simplest answer. All I needed to do was click on the toolbox anywhere so it was the window selected and then hit

Alt-Spacebar

From there I was in the menu and could mouse/arrow down to “move” and then use my arrows as normal to get the bastard back.

Posted in Gimp - Tagged Gimp, move, screen, window

Windows> Add Windows 7 Snap feature to XP

Oct28
2010
Written by Scott Rowley

Check out the following software for an excellent version of Windows 7 snap for your Windows 2000, XP, Vista and even improve on a Windows 7 box.

http://www.nurgo-software.com/products/aquasnap
Tagged 7, aero, aqua, nurgo, snap

Windows> Save & Restore icon locations

Oct27
2010
Written by Scott Rowley

If you are like me and need to remote desktop into your work PC (or any PC) you may run into the problem of all your icons being rearranged as you change resolutions. I especially run into the problem as I remote in from my laptop into my desktop that has dual monitors. I recently found and tested the following software and so far its working great for me:

Desktop Restore

All you need do is:

1. Install the software (takes seconds)
2. Arrange the icons the way you want them
3. Right click on your desktop

4. Select save

Now after you have remoted in to your desktop and then logged back out, when you get back to your desktop just right click and select “Restore Desktop” and instantly your icons are back to their saved locations.

From “ah what the hell?!”

To glorious organization restored.

Tagged grid, icon, locations, restore, save, software

Corrections? Questions? Comments?

Find an error?
Everything work out great for you?
Have some feedback?
Like to see something added to the article?

PLEASE leave us a comment after the article and let us know how we are doing, or if something needs corrected, improved or clarified.

Thank you!
- The Management

Advertisement

Sudo Bash
By Geeks - For Geeks

Back to Top